Identifying ghosts in Demonology can feel like a guessing game without the right tools at your disposal. To ensure you're fully equipped and don't have to rely on guesswork, dive into our comprehensive **Demonology equipment guide** below.
How to Buy and Use Equipment in Demonology
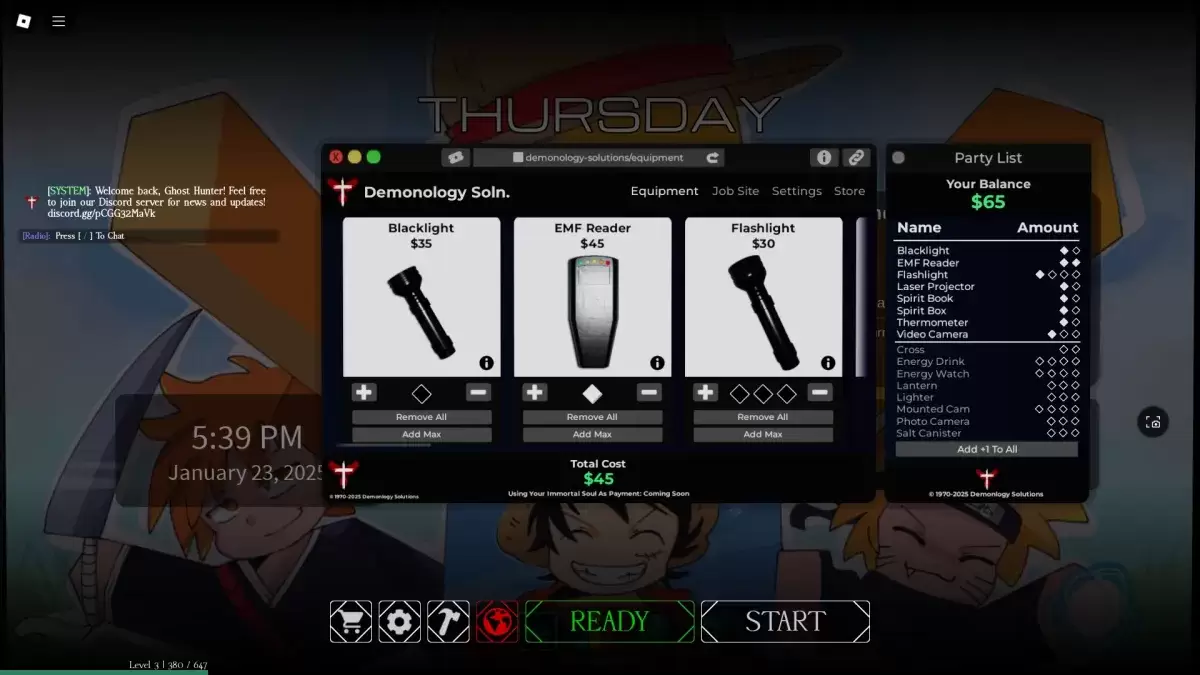
Before embarking on a Demonology run, you have the opportunity to **purchase additional equipment**. Keep in mind that the **items** you buy are **valid only for the upcoming run**, so it's wise to plan your purchases carefully. Additionally, some items may appear within the investigation zones. You're allowed to carry up to three items simultaneously. To utilize an item, simply press the **RMB (M2)** button, and to discard it, press the **G** key.
Evidence Equipment in Demonology
In Demonology, **evidence equipment** plays a crucial role in **identifying Ghosts**. These tools are essential for gathering the **evidence** needed to pinpoint the type of Ghost you're facing. For a deeper dive into ghost identification, check out our detailed guide on the subject. Moreover, this equipment can also be used to **entice Ghosts to manifest**, perfect for capturing those spectral snapshots.
| Item | Use | Party limit | Price |
|---|---|---|---|
| **Blacklight** | • Turn on the Blacklight to search for fingerprints, handprints, or footprints left by ghosts. | 2 | $35 |
| **EMF Reader** | • Use the EMF Reader to detect ghost activity in your vicinity. When it senses a ghost, it will light up and make a noise. Drop it to use it as a perimeter scanner. | 2 | $45 |
| **Laser Projector** | • Activate and place the Laser Projector to emit beams that highlight any ghosts moving nearby. | 2 | $65 |
| **Spirit Book** | • Leave the Spirit Book on the ground. If a ghost that leaves Spirit Book evidence is nearby, it may pick up the book and write in it. | 2 | $40 |
| **Spirit Box** | • Engage with the Spirit Box to access various dialogue options for communicating with nearby ghosts. Be prepared for them to ignore you at times. | 2 | $50 |
| **Thermometer** | • Use the Thermometer to monitor the surrounding temperature. Normal room temperature ranges from 15-19 degrees; deviations could indicate a ghostly presence. | 2 | $30 |
| **Video Camera** | • Switch to camera view with the Video Camera to spot Ghost Orbs. You can also place it on the ground and monitor it via the PC at the spawn point. | 3 | $50 |
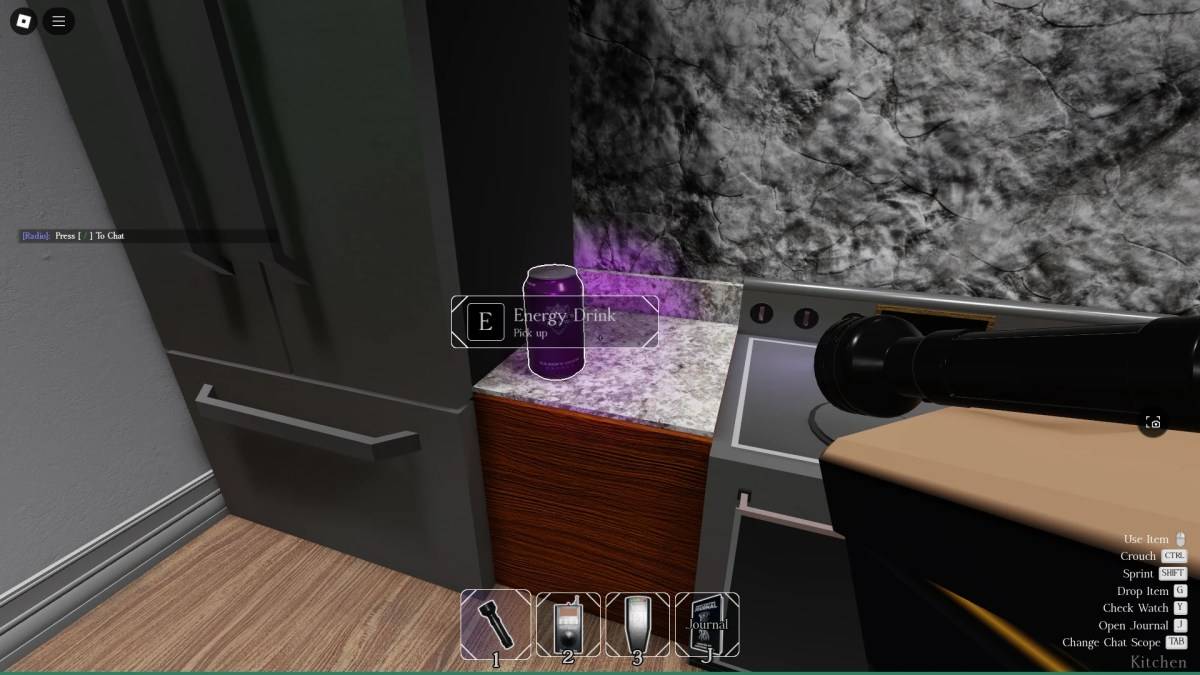
Optional Equipment in Demonology
The **optional equipment** in Demonology is designed to aid your survival and help you achieve secondary mission objectives. As with all equipment, there's a limit on how many of these items your party can bring into a run.
| Item | Use | Party limit | Price |
|---|---|---|---|
| Flashlight | • Illuminate your path with the Flashlight's cone of light. | 4 | $30 |
| Cross | • Use the Cross to ward off a hunting ghost. | 2 | $30 |
| Energy Drink | • Boost your Energy levels with an Energy Drink. | 4 | $30 |
| Energy Watch | • Check your remaining Energy with the Energy Watch. | 4 | $50 |
| Lantern | • Hold the Lantern to prevent passive Energy drain. | 3 | $15 |
| Lighter | • Use the Lighter to ignite the Lantern, candles, or as a light source. | 3 | $10 |
| Mounted Cam | • Similar to the Video Camera, but can be used alongside other items. Monitor it through the PC next to the spawn point. | 4 | $50 |
| Photo Camera | • Capture images of ghosts and other elements with the Photo Camera, useful for completing optional objectives. | 3 | $40 |
| Salt Canister | • Use Salt to ward off some ghosts and secure handprint evidence. | 3 | $15 |
That wraps up our comprehensive guide on equipment in Demonology. For more insights and tips on Roblox games, make sure to explore the Roblox guides section on Escapist.